Connecting to a node over SSH
To connect to a Managed Service for Kubernetes cluster node over SSH:
-
Add the public key to the meta information when creating a Managed Service for Kubernetes node group.
Note
SSH connection using a login and password is disabled by default on Linux images that are used on Managed Service for Kubernetes nodes.
-
Configure security groups for the Managed Service for Kubernetes cluster.
Warning
Security group settings may prevent connection to the Managed Service for Kubernetes cluster.
For more information, see Connecting to a VM via SSH.
Create SSH key pairs
Prepare the keys for use with your Managed Service for Kubernetes cluster node. To do this:
-
Open the terminal.
-
Use the
ssh-keygencommand to create a new key:ssh-keygen -t ed25519After you run the command, you will be asked to specify the names of files where the keys will be saved and enter the password for the private key. The default name is
id_ed25519. Keys are created in the~/.sshdirectory.The public part of the key will be saved to a file named
<key name>.pub.
-
Run
cmd.exeorpowershell.exe. -
Use the
ssh-keygencommand to create a new key. Run this command:ssh-keygen -t ed25519After you run the command, you will be asked to specify the names of files where the keys will be saved and enter the password for the private key. The default name is
id_ed25519. Keys are created in theC:\Users\<username>\.ssh\folder.The public part of the key will be saved to a file named
<key name>.pub.
Create keys using the PuTTY app:
-
Download and install PuTTY.
-
Make sure that the directory where you installed PuTTY is included in
PATH:- Right-click My computer. Click Properties.
- In the window that opens, select Additional system parameters, then Environment variables (located in the lower part of the window).
- Under System variables, find
PATHand click Edit. - In the Variable value field, append the path to the directory where you installed PuTTY.
-
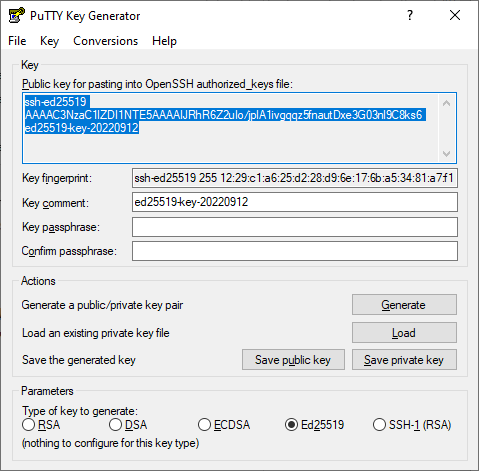
Launch the PuTTYgen app.
-
Select Ed25519 as the pair type to generate. Click Generate and move the cursor in the field above it until key creation is complete.
-
In Key passphrase, enter a strong password. Enter it again in the field below.
-
Click Save private key and save the private key. Do not share its key phrase with anyone.
-
Save the key in a text file in a single line. To do this, copy the public key from the text field to a text file named
id_ed25519.pub.
Convert the public key to the relevant format
You can manage users and SSH keys via metadata, which is why you must transmit keys in a defined format.
The file with the public key is created in the format:
ssh-ed25519 AAAAB3NzaC***********lP1ww ed25519-key-20190412
You need to convert the key to <username>:ssh-ed25519 <key_body> <username> format so that it looks like this:
username:ssh-ed25519 AAAAB3NzaC***********lP1ww username
You can pass multiple public keys in the same file to grant access to different users:
username:ssh-ed25519 AAAAB3NzaC***********lP1ww username
username2:ssh-ed25519 ONEMOREkey***********avEHw username2
Create a node group and add the public key
To create a Managed Service for Kubernetes node group with the required parameters, use the following command:
yc managed-kubernetes node-group create \
  --name <node_group_name> \
  --cluster-name <cluster_name> \
  --fixed-size <number_of_nodes_in_the_group> \
  --network-interface security-group-ids=[<list_of_security_groups>],subnets=<subnet_name>,ipv4-address=nat \
  --metadata-from-file ssh-keys=<public_key_file_name>
Warning
The user-data key is not supported for transmitting user data. Parameters for ssh connections must be specified in the ssh-keys key in the VM metadata.
Update node group keys
To update the SSH keys of a Managed Service for Kubernetes node group, use the following command:
yc managed-kubernetes node-group add-metadata \
  --name <node_group_name> \
  --metadata-from-file ssh-keys=<public_key_file_name>
Get the public IP address of the node
To connect, specify the Managed Service for Kubernetes node public IP address. You can find it using one of the following methods.
- Open the Compute Cloud section in the folder where you created your Managed Service for Kubernetes cluster.
- In the left-hand panel, select Instance groups.
- Click the instance group with the name that matches the Managed Service for Kubernetes node group ID.
- In the window that opens, go to the List of VMs tab.
- Click the VM that you want to find the public address for.
- The public IP address is shown in the Network section in Public IPv4.
-
Find out the ID of the instance group that corresponds to the Managed Service for Kubernetes node group.
This parameter is shown in the
INSTANCE GROUP IDcolumn.yc managed-kubernetes node-group listResult:
+----------------------+----------------------+----------------+----------------------+---------------------+---------+------+ | ID | CLUSTER ID | NAME | INSTANCE GROUP ID | CREATED AT | STATUS | SIZE | +----------------------+----------------------+----------------+----------------------+---------------------+---------+------+ | cat684ojo3ir******** | cata9ertn6tc******** | test-nodegroup | cl17i6943n92******** | 2019-04-12 12:38:35 | RUNNING | 2 | +----------------------+----------------------+----------------+----------------------+---------------------+---------+------+ -
View the list of Managed Service for Kubernetes nodes that belong to this group.
The public IP address of the Managed Service for Kubernetes node is shown in the
IPcolumn after~.yc compute instance-group list-instances cl17i6943n92********Result:
+----------------------+---------------------------+--------------------------+---------------+----------------+
|     INSTANCE ID      |           NAME            |            IP            |    STATUS     | STATUS MESSAGE |
+----------------------+---------------------------+--------------------------+---------------+----------------+
| ef31h24k03pg******** | cl17i6943n92********-itif | 10.0.0.27~84.201.145.251 | RUNNING [53m] |                |
| ef37ddhg9i7j******** | cl17i6943n92********-ovah | 10.0.0.22~84.201.149.184 | RUNNING [53m] |                |
+----------------------+---------------------------+--------------------------+---------------+----------------+
-
Install kubectl and configure it to work with the created cluster.
-
Run this command:
kubectl get nodes -o wideResult:
NAME                       STATUS  ROLES   AGE  VERSION  INTERNAL-IP  EXTERNAL-IP     OS-IMAGE            KERNEL-VERSION     CONTAINER-RUNTIME
cl17i6943n92********-itif  Ready   <none>  31m  v1.13.3  10.0.0.27    84.201.145.251  Ubuntu 18.04.1 LTS  4.15.0-29-generic  docker://18.6.2
cl17i6943n92********-ovah  Ready   <none>  31m  v1.13.3  10.0.0.22    84.201.149.184  Ubuntu 18.04.1 LTS  4.15.0-29-generic  docker://18.6.2
The public IP address is listed in the
EXTERNAL-IPcolumn.
Connect to the node
You can connect to a Managed Service for Kubernetes node over SSH once it starts (the status is RUNNING). You can use the ssh utility in Linux or macOS, or PuTTY in Windows.
In the terminal, run the following command:
ssh <username>@<public_IP_address_of_node>
If connecting to the Managed Service for Kubernetes node for the first time, you may get an unknown host warning:
The authenticity of host '130.193.40.101 (130.193.40.101)' cannot be established.
ECDSA key fingerprint is SHA256:PoaSwqxRc8g6iOXtiH7ayGHpSN0MXwUfWHk********.
Are you sure you want to continue connecting (yes/no)?
Type yes in the terminal and press Enter.
In Windows, a connection is established using the PuTTY application.
- Run the Pageant application.
- Right-click on the Pageant icon in the task bar.
- In the context menu, select Add key.
- Select a PuTTY-generated private key in the
.ppkformat. If a password is set for the key, enter it.
- Run PuTTY.
-
In the Host Name (or IP address) field, enter the public IP address of the VM you want to connect to. Specify port
22and SSH as the connection type.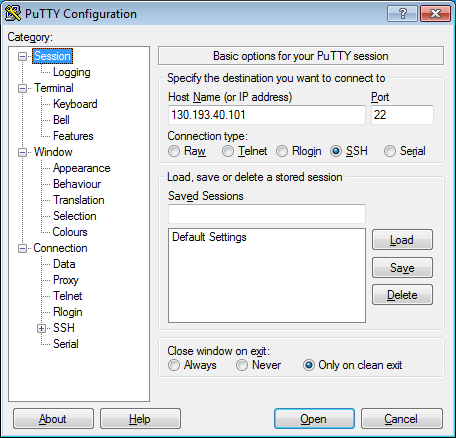
-
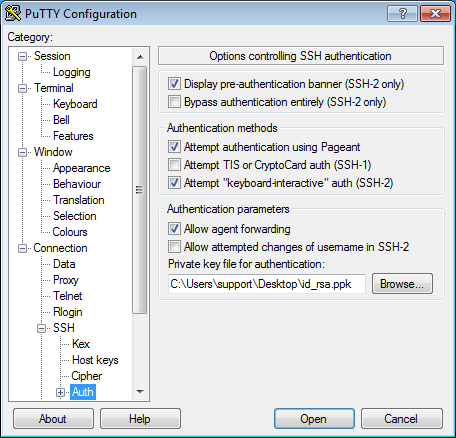
In the tree on the left, select Connection - SSH - Auth.
-
Set the Allow agent forwarding option.
-
In the Private key file for authentication field, select the file with the private key.
-
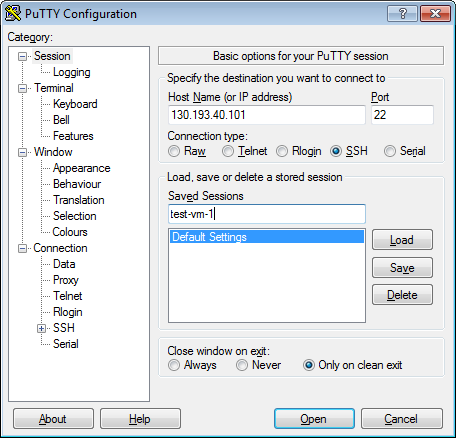
Go back to the Sessions menu. In the Saved sessions field, enter any session name and click Save. The session settings are saved under the specified name. You can use this session profile to connect using Pageant.
-
Click Open. If connecting to the Managed Service for Kubernetes node for the first time, you may get an unknown host warning:
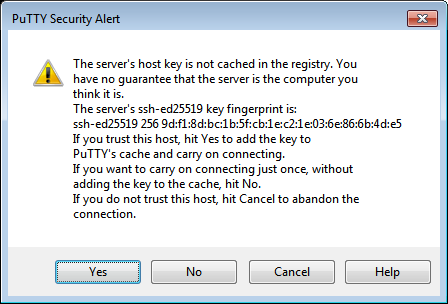
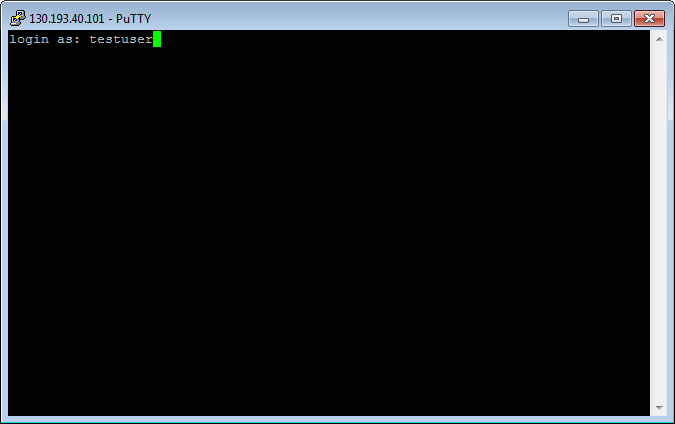
Click Yes. A terminal window opens suggesting that you enter the login of the user on whose behalf the connection is being established. Type the user name you specified in the file with the public key and click Enter. If everything is configured correctly, the connection with the server will be established.
-
If you saved the session profile in PuTTY, you can use Pageant to establish a connection in the future:
- Right-click on the Pageant icon in the task bar.
- Select the Saved sessions menu item.
- In the saved sessions list, select the necessary session.