OpenCart online shop
OpenCart is a platform where you can create your own online store. The platform is free and open-source. With OpenCart, you can create an online store of any complexity using a wide selection of community-supported extensions.
In this guide, you create and configure an online store built on OpenCart. To do this, you deploy a VM with the pre-installed OpenCart platform and the programs it needs to run, specifically the MySQL server.
This scenario describes how to configure a local MySQL server and deploy a Managed Service for MySQL database cluster if your local DBMS doesn't offer high enough performance or functionality. If you don't need a cluster, skip this step.
To set up your online store on OpenCart:
- Prepare your cloud
- Create a VM with the OpenCart platform
- (optional) Create a MySQL DB
- Configure OpenCart
Prepare your cloud
Sign up for Yandex Cloud and create a billing account:
- Go to the management console and log in to Yandex Cloud or create an account if you do not have one yet.
- On the Billing page, make sure you have a billing account linked and it has the
ACTIVEorTRIAL_ACTIVEstatus. If you do not have a billing account, create one.
If you have an active billing account, you can go to the cloud page to create or select a folder to run your infrastructure.
Learn more about clouds and folders.
Required paid resources
The infrastructure support cost for OpenCart includes:
- A fee for a continuously running VM (see Yandex Compute Cloud pricing).
- A fee for using a dynamic or static external IP address (see Yandex Virtual Private Cloud pricing).
- If you plan to set up a managed database, the fee also includes the DB cluster fee (see Managed Service for MySQL pricing).
Create a VM with the OpenCart platform
To create a VM:
-
On the management console folder page, click Create resource and select Virtual machine.
-
In the Name field, enter a name for the VM, such as
opencart.- The name must be from 3 to 63 characters long.
- It may contain lowercase Latin letters, numbers, and hyphens.
- The first character must be a letter and the last character cannot be a hyphen.
-
Select an availability zone to put your virtual machine in.
-
Under Image/boot disk selection, click the Cloud Marketplace tab and select OpenCart as your public image.
The OpenCart platform and the necessary components, including PHP and MySQL, are pre-installed on the boot disk.
-
Under Disks, select an SSD with 13 GB.
-
Under Computing resources, specify the following configuration:
- Platform: Intel Ice Lake.
- Guaranteed vCPU share: 20%
- vCPU: 2.
- RAM: 4 GB.
-
Under Network settings:
- Select the network and subnet to connect the VM to. If you don't have a network or subnet yet, you can create them on the VM creation page: click Create new network or Create new subnet.
- In the Public address field, leave the Auto value to assign the virtual machine a random external IP address from the Yandex Cloud pool, or select a static address from the list if you reserved one in advance.
-
Under Access, specify the information required to access the VM:
- In the Login field, enter your preferred username to be created on the VM, for example,
ubuntu. - In the SSH key field, paste your public SSH key. You need to create a key pair for the SSH connection yourself. See the section about how to connect to VMs via SSH.
- In the Login field, enter your preferred username to be created on the VM, for example,
-
Click Create VM.
Create a database cluster MySQL
If you expect a significant load on the database or would like to use a managed DBMS service, deploy the DB cluster using Managed Service for MySQL. The service takes control of DBMS support and maintenance. In other words, it monitors the status and current activity and enables automatic backup and easily configurable fault tolerance functionality.
To create a database cluster:
-
On the folder page in the management console, click Create resource and select the MySQL cluster option.
-
Specify a name for the cluster, such as
opencart. -
Under Host class, select s2.micro. These characteristics are enough for the system to run under a normal workload.
-
Under Database, enter:
- DB name: Leave the default value,
db1. - Username to connect to the database: Leave the default value,
user1. - Password for OpenCart to use to access the MySQL database.
- DB name: Leave the default value,
-
Under Hosts, change the Availability zone for the database. To do this, click to the right of the currently selected availability zone, and select the availability zone from the drop-down list.
Tip
We recommend selecting the same availability zone as when you created the VM. This reduces latency between the VM and database.
-
(optional) If you want to ensure fault tolerance for the database, add additional hosts to the cluster by clicking Add host and specify the availability zone for the host.
-
Leave the other fields as they are.
-
Click Create cluster.
Creating the DB cluster may take several minutes.
Configure OpenCart
-
Open the web interface of the OpenCart online store. To do this, open the address
http://<VM-public-IP-address>/in the browser. The OpenCart settings page opens. -
Read the license and click Continue.

-
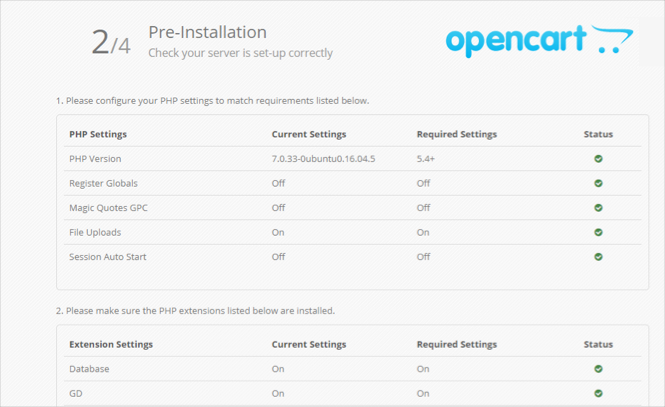
Make sure that all the lines with system requirements are marked green and click Continue.
-
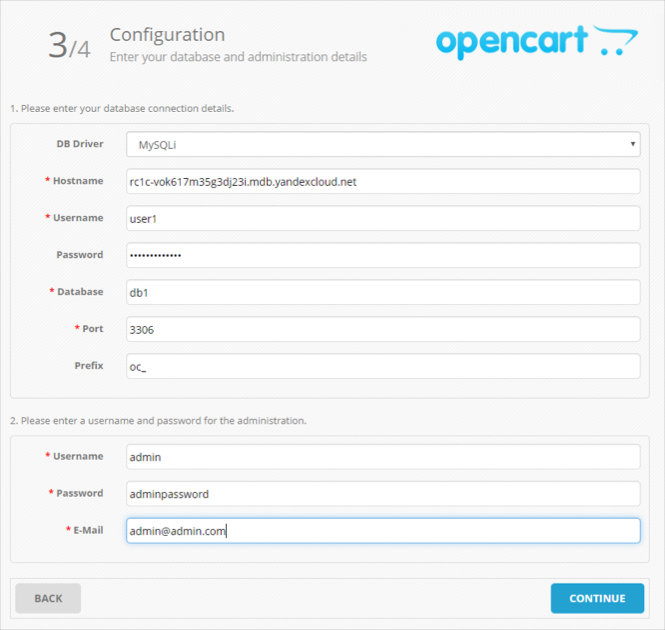
Configure database access:
Local server MySQLCluster Managed Service for MySQLDB connection attributes are generated in a special file when a VM is created:
- Log in to the created VM via SSH.
- Switch to
sudo -iadministration mode. - Open
default_passwords.txtin the admin's home directory:root@opencart:~# cat default_passwords.txt MYSQL_USER=opencart MYSQL_PASS=qDbvN1R6tA6ET MYSQL_ROOT_PASS=5DiVb80l1kXVz MYSQL_DB=opencart - In the OpenCart settings page database section, enter the relevant data:
- Username: The
MYSQL_USERvariable value. - Database: The
MYSQL_DBvariable value. - Password: The
MYSQL_PASSvariable value.
Leave the other fields as they are.
- Username: The
If you're using a Managed Service for MySQL cluster, enter the required cluster attributes:
- Hostname: Enter the Fully Qualified Domain Name (FQDN) of the created database. To find it:
- Open the folder page in the management console in a new browser tab.
- Go to the section Managed Service for MySQL.
- Select the cluster you created in the table.
- Select the Hosts tab in the left menu.
- Move the cursor to the Hostname field (for example,
rc1c-vok617m35g3dj23i) and copy the full database domain name by clicking the icon .
- Username: The username (
user1in the example). - Database: The DB name (
db1in the example). - Password: The user password you specified.
Leave the other fields as they are.
-
Enter the administrator's name, their password, and current email address. Then click Continue.
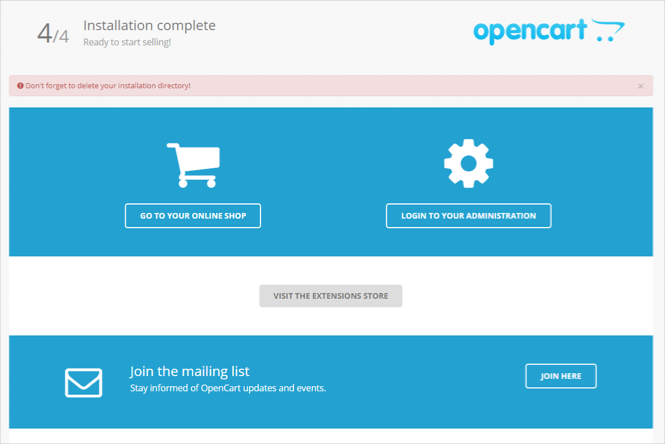
-
A page opens notifying you that the system configuration is complete. To set up the online store, click Login to your administration and enter your admin username and password.
-
When the installation is complete, log in to the VM via SSH and delete the installation files you don't need anymore:
user@opencart:~$ sudo -i root@opencart:~# rm -rf /var/www/opencart/install/ -
To check the home page, go to
http://<VM-public-IP-address>/. You see the home page of your website as users visiting your online store see it.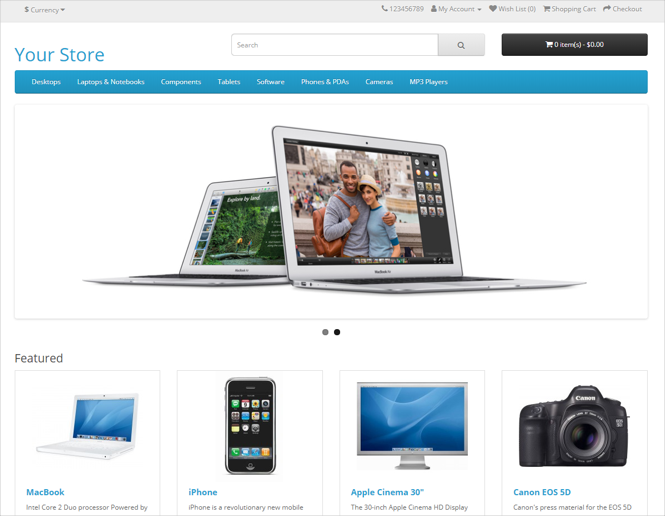
How to delete created resources
To stop paying for your deployed server, you need to delete your virtual machine and database cluster (if you created one):
- Delete the VM (in the example, the VM is named
opencart). - Delete the Managed Service for MySQL cluster (in the example, the DB cluster is named
opencart).
If you reserved a static public IP address specifically for this VM:
- Select the VPC in your folder.
- Go to the IP addresses tab.
- Find the required address, click , and select Delete.