Creating a website in WordPress

Create and configure a website in WordPress CMS using a special image of the VM.
To set up a website in WordPress:
If you no longer need the website, delete the VM containing it.
You can also deploy the infrastructure for hosting a website in the WordPress CMS via Terraform using a ready-made configuration file.
Prepare your cloud
Sign up for Yandex Cloud and create a billing account:
- Go to the management console and log in to Yandex Cloud or create an account if you do not have one yet.
- On the Billing page, make sure you have a billing account linked and it has the
ACTIVEorTRIAL_ACTIVEstatus. If you do not have a billing account, create one.
If you have an active billing account, you can go to the cloud page to create or select a folder to run your infrastructure.
Learn more about clouds and folders.
Make sure the selected folder has a cloud network with a subnet in at least one availability zone. To do this, select VPC on the folder page. If the list contains a network, click on its name to see the list of subnets. If the subnets or network you need are not listed, create them.
Required paid resources
The cost of hosting a website in WordPress includes:
- A fee for a continuously running VM (see Yandex Compute Cloud pricing).
- A fee for using a dynamic or static external IP address (see Yandex Virtual Private Cloud pricing).
Create a security group
To create a security group:
-
In the management console, select Virtual Private Cloud.
-
Open the Security groups tab.
-
Click Create group.
-
Enter the name of the group:
wordpress. -
Select the Network.
-
Under Rules, create the following rules using the instructions below the table:
Traffic
directionDescription Port
rangeProtocol Source/
destination typeSource /
destinationOutgoing any All Any CIDR 0.0.0.0/0 Incoming ext-http 80 TCP CIDR 0.0.0.0/0 Incoming ext-https 443 TCP CIDR 0.0.0.0/0 - Select the Outgoing traffic or Incoming traffic tab.
- Click Add rule.
- In the Port range window that opens, specify the port receiving traffic. Do not indicate anything for outgoing traffic.
- In the Protocol field, specify the required protocol. For outgoing traffic, leave Any to allow traffic over all protocols.
- In the Destination or Source field, select the CIDR, and the rule is applied to a range of IP addresses. In the CIDR blocks field, enter
0.0.0.0/0. - Click Save. Repeat the steps to create all rules from the table.
-
Click Save.
Create a virtual machine for WordPress
To create a VM:
-
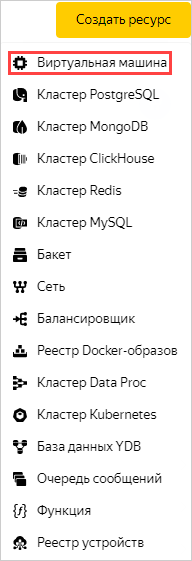
On the folder page in the management console, click Create resource and select Virtual machine.
-
In the Name field, enter the VM name:
wordpress.- The name must be from 3 to 63 characters long.
- It may contain lowercase Latin letters, numbers, and hyphens.
- The first character must be a letter and the last character cannot be a hyphen.
-
Select an availability zone to place the VM in.
-
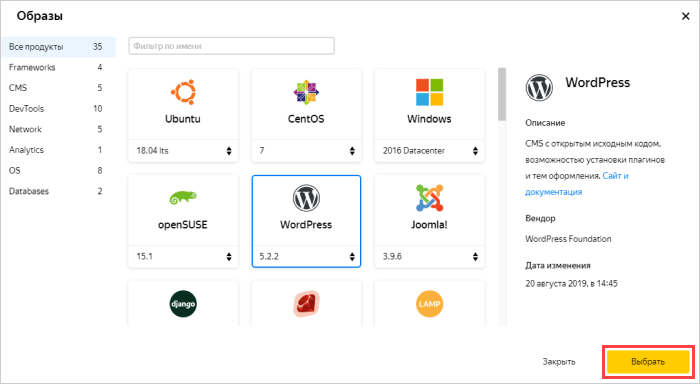
Under Image/boot disk selection, click the Cloud Marketplace tab and select WordPress as your public image.
-
Under Computing resources:
- Choose a platform.
- Specify the necessary number of vCPUs and amount of RAM.
The minimum configuration is enough for testing:
- Platform: Intel Ice Lake.
- vCPU: 2.
- Guaranteed vCPU share: 20%.
- RAM: 1 GB.
-
In Network settings, select the subnet to connect the VM to once it is created.
-
In Public address, select Automatically.

-
In Security group, select the
wordpressgroup. -
Enter the VM access information:
-
Enter the username in the Login field.
-
In the SSH key field, paste the contents of the public key file.
You will need to create a key pair for the SSH connection yourself. For details, see Connecting to a Linux VM via SSH.
-
-
Click Create VM.
The VM may take several minutes to create. When the VM's status changes to RUNNING, you can begin configuring the website.
Once created, the VM is assigned an IP address and a host name (FQDN). This data can be used when configuring the DNS and SSH access.
Configure the DNS (if you have a domain name)
If you have a registered domain name, use the Cloud DNS service to manage the domain.
You can also configure the DNS via Terraform. For more information, see How to create an infrastructure using Terraform.
The tutorial below describes configuring DNS for the example.com domain name.
Add a zone
To add a public zone:
- Open the Cloud DNS section of the folder where you need to create a DNS zone.
- Click Create zone.
- Specify the zone settings:
- Zone name:
example-zone-1. - Zone:
example.com. Specify your registered domain. - Type: Public.
- Zone name:
- Click Create.
Add resource records
Create DNS records in the public zone:
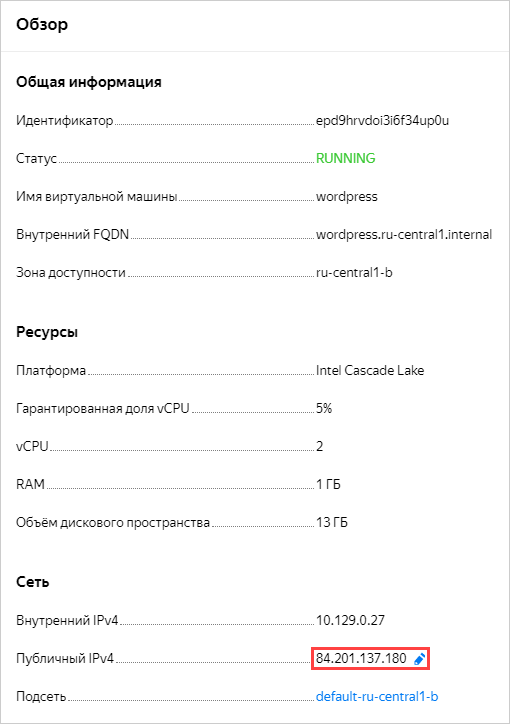
- Under Network on the VM page in the management console find the VM's public IP address.
- Create an A record:
- Open the Cloud DNS section of the folder where the
example.comzone is located. - Select
example.comfrom the list. - Click Create record.
- Set the record parameters:
- Name: Leave empty.
- Record type: Keep
Aas the value. - TTL (record time to live): Leave the default.
- Value: Enter your VM's public address.
- Click Create.
- Open the Cloud DNS section of the folder where the
- Create a CNAME record:
- Select
example.comfrom the list. - Click Create record.
- Set the record parameters:
- Name:
www. - Record type: Select
CNAMEas the value. - TTL (record time to live): Leave the default.
- Value: Enter
example.com.
- Name:
- Click Create.
- Select
Delegate the domain name
Delegation is the transfer of authority from the registrar's servers to yours. For a domain, NS resource records are created (ns1.yandexcloud.net and ns2.yandexcloud.net).
To delegate a domain, specify its DNS servers in the registrar's account.
Delegation does not take effect immediately. It normally takes internet service providers up to 24 hours (86400 seconds) to update records. This depends on the TTL value which determines how long domain records are cached.
You can verify domain delegation using the Whois service or the dig utility:
dig +short NS example.com
Result:
ns2.yandexcloud.net.
ns1.yandexcloud.net.
Setting up WordPress
After the wordpress VM's status changes to RUNNING, do the following:
-
Under Network on the VM page in the management console, find the VM's public IP address and enter it in the A resource record you previously created.
-
Open the domain name you configured or the VM's address in the browser.
-
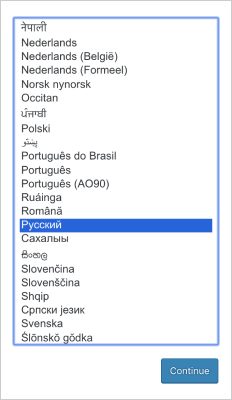
Select the language and click Continue.
-
Fill out information to access the website:
- Enter any name for the website (for example,
yc-wordpress). - Specify the username to be used to log in to the admin panel (for example,
yc-user). - Enter the password to be used to log in to the admin panel.
- Enter your email address.
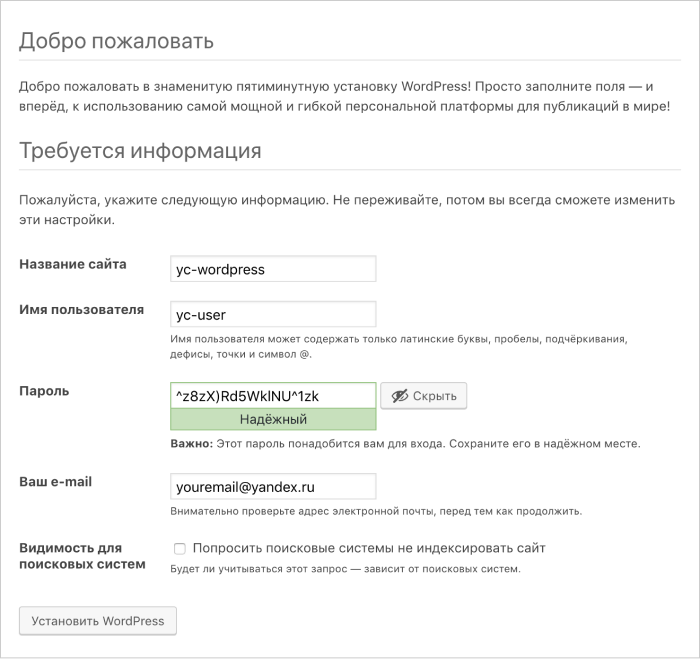
- Enter any name for the website (for example,
-
Click Install WordPress.
-
If the installation is successful, click Log in.
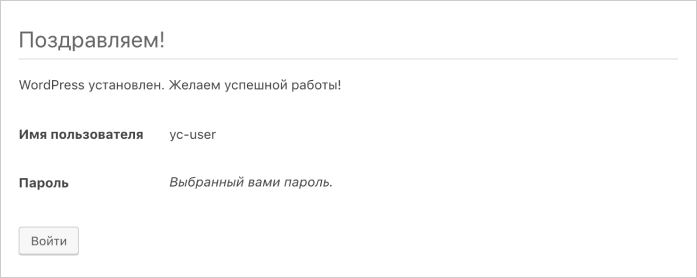
-
Log in to the website with the username and password specified in the previous steps. This opens the admin panel, where you can start working with your website.
-
Make sure the website is accessible by opening the VM's public IP address in your browser.
How to delete created resources
To stop paying for your deployed server, just delete the wordpress VM.
If you reserved a static public IP address specifically for this VM:
- Select VPC in your folder.
- Go to the IP addresses tab.
- Find the required address, click , and select Delete.
How to create an infrastructure using Terraform
With Terraform, you can quickly create a cloud infrastructure in Yandex Cloud and manage it using configuration files. They store the infrastructure description in HashiCorp Configuration Language (HCL). Terraform and its providers are distributed under the Business Source License.
For more information about the provider resources, see the documentation on the Terraform website or mirror website.
If you change the configuration files, Terraform automatically determines which part of your configuration is already deployed and what should be added or removed.
To host your site in WordPress CMS via Terraform:
-
Install Terraform, get the authentication credentials, and specify the source for installing the Yandex Cloud provider (see Configure a provider, step 1).
-
Prepare files with the infrastructure description:
Ready-made archiveCreating files manually- Create a directory for files:
- Download the archive (1 KB).
- Unpack the archive to the directory. The
wordpress.tffile should be added to the directory.
-
Create a directory for files:
-
Create the
wordpress.tfconfiguration file in the directory:wordpress.tfterraform { required_providers { yandex = { source = "yandex-cloud/yandex" version = ">= 0.47.0" } } } provider "yandex" { zone = "ru-central1-a" } resource "yandex_compute_image" "wordpress" { source_family = "wordpress" } resource "yandex_compute_disk" "boot-disk" { name = "bootvmdisk" type = "network-hdd" zone = "ru-central1-a" size = "20" image_id = yandex_compute_image.wordpress.id } resource "yandex_compute_instance" "vm-wordpress" { name = "wordpress" platform_id = "standard-v3" resources { core_fraction = 20 cores = 2 memory = 1 } boot_disk { disk_id = yandex_compute_disk.boot-disk.id } network_interface { subnet_id = yandex_vpc_subnet.subnet-1.id nat = true security_group_ids = ["${yandex_vpc_security_group.sg-1.id}"] } metadata = { ssh-keys = "<username>:<SSH_key_contents>" } } resource "yandex_vpc_security_group" "sg-1" { name = "wordpress" description = "Description for security group" network_id = yandex_vpc_network.network-1.id ingress { protocol = "TCP" description = "ext-http" v4_cidr_blocks = ["0.0.0.0/0"] port = 80 } ingress { protocol = "TCP" description = "ext-https" v4_cidr_blocks = ["0.0.0.0/0"] port = 443 } egress { protocol = "ANY" description = "any" v4_cidr_blocks = ["0.0.0.0/0"] } } resource "yandex_vpc_network" "network-1" { name = "network1" } resource "yandex_vpc_subnet" "subnet-1" { name = "subnet1" zone = "ru-central1-a" network_id = yandex_vpc_network.network-1.id v4_cidr_blocks = ["192.168.1.0/24"] } resource "yandex_dns_zone" "zone-1" { name = "example-zone-1" description = "Public zone" zone = "example.com." public = true } resource "yandex_dns_recordset" "rs-1" { zone_id = yandex_dns_zone.zone-1.id name = "example.com." ttl = 600 type = "A" data = ["${yandex_compute_instance.vm-wordpress.network_interface.0.nat_ip_address}"] } resource "yandex_dns_recordset" "rs-2" { zone_id = yandex_dns_zone.zone-1.id name = "www" ttl = 600 type = "CNAME" data = ["example.com"] }
For more information about the parameters of resources used in Terraform, see the provider documentation:
-
Under
metadata, enter the metadata for creating a VM instance:<username>:<SSH_key_contents>. Regardless of the username specified, the key is assigned to the user set in the WordPress image configuration. In different images, these users differ. For more information, see Keys processed in public images. -
Create resources:
-
In the terminal, change to the folder where you edited the configuration file.
-
Make sure the configuration file is correct using the command:
terraform validateIf the configuration is correct, the following message is returned:
Success! The configuration is valid. -
Run the command:
terraform planThe terminal will display a list of resources with parameters. No changes are made at this step. If the configuration contains errors, Terraform will point them out.
-
Apply the configuration changes:
terraform apply -
Confirm the changes: type
yesin the terminal and press Enter.
-