Creating a Linux VM
Create a Linux VM using Compute Cloud from the Yandex Cloud management console and connect to it.
Getting started
To get started in Yandex Cloud:
- Log in to the management console. If you are not signed up yet, navigate to the management console and follow the instructions.
- In Yandex Cloud Billing, make sure you have a billing account linked and it has the
ACTIVEorTRIAL_ACTIVEstatus. If you do not yet have a billing account, create one. - If you do not have a directory yet, create one.
- If you do not have an SSH key pair yet, create one.
Create a VM
-
In the management console, select the folder to create your VM in.
-
In the list of services, select Compute Cloud.
-
Click Create virtual machine.
-
Under Basic parameters:
-
Enter a name and description for the VM. The naming requirements are as follows:
- The name must be from 3 to 63 characters long.
- It may contain lowercase Latin letters, numbers, and hyphens.
- The first character must be a letter and the last character cannot be a hyphen.
Note
The VM name is used to generate an internal FQDN only once: when creating a VM. If the internal FQDN is important to you, choose an appropriate name for the VM at the creation stage.
-
Select an availability zone to place your VM in.
-
-
Under Image/boot disk selection, select an image and a Linux-based OS version.
-
(Optional) Under Disks and file storages, select the Disks tab and configure a boot disk:
-
Select the disk type.
-
Specify the required disk size.
-
(Optional) To encrypt a boot disk, under Disks and file storages, configure encryption parameters for the disk:
- Select the Encrypted disk option.
- In the KMS Key field, select the key with which you want to encrypt the disk. To create a new key, click Create.
- In the Service account field, select the service account with the
kms.keys.encrypterDecrypterrole for the specified key. To create a service account, click Create.
The encryption feature in Compute Cloud is currently at the Preview stage. To access it, open the resource creation page and click Request access under Encryption or contact support.
If you deactivate the key used to encrypt a disk or snapshot, access to the data will be suspended until you reactivate the key.
Alert
If you destroy the key or its version used to encrypt a disk or snapshot, access to the data will be irrevocably lost. Learn more in Destroying key versions.
If you want to create a VM from an existing disk, under Disks and file storages, add a disk:
-
Click Add disk.
-
Enter the disk name.
-
Select the disk type.
-
Specify the required block size.
-
Specify the required disk size.
-
(Optional) To encrypt a disk, configure encryption parameters.
-
(Optional) Enable the Advanced option in the Delete with the VM field if you need to automatically delete the disk when deleting the VM it will be attached to.
-
In the Contents field, select
Disk. -
Click Add.
-
-
(Optional) Under Disks and file storages, select the File storages tab and attach the file storage:
- Click Attach file storage.
- In the window that opens, specify the file storage.
- Enter the device name.
- Click Attach file storage.
-
Under Computing resources:
- Choose a platform.
- Specify the guaranteed share and the required number of vCPUs, as well as the amount of RAM.
- If required, make your VM preemptible.
- (Optional) Enable a software-accelerated network.
-
Under Network settings:
-
Enter a subnet ID or select a cloud network from the list.
If you do not have a network, click Create network to create one:- In the window that opens, enter the network name and specify the folder to host the network.
- (Optional) To automatically create subnets, select the Create subnets option.
- Click Create.
Each network must have at least one subnet. If there is no subnet, create one by selecting Add subnet.
-
In the Public IP field, choose a method for assigning an IP address:
Auto: Assign a random IP address from the Yandex Cloud IP pool. With this, you can enable DDoS protection using the option below.List: Select a public IP address from the list of previously reserved static addresses. For more information, see Converting a dynamic public IP address to static.No address: Do not assign a public IP address.
-
In the Internal IPv4 address field, select the method for assigning internal addresses:
AutoorManual. -
(Optional) Create records for the VM in the DNS zone:
- Expand the DNS settings for internal addresses section and click Add record.
- Specify the zone, FQDN, and TTL for the record. When setting the FQDN, you can select
Detect automaticallyfor the zone.
You can add multiple records to internal DNS zones. For more information, see Cloud DNS integration with Compute Cloud. - To create another record, click Add record.
-
Select the appropriate security groups.
-
-
(Optional) To back up your VMs automatically using Cloud Backup, under Backups, select how your VM should connect to the service.
For more information, see Connecting Compute Cloud VMs to Cloud Backup.
-
Under Access, specify the information required to access the instance:
-
(Optional) Select or create a service account. With a service account, you can flexibly configure access rights for your resources.
-
Enter username in the Login field.
Alert
Do not use the
rootusername or other names reserved by the OS. To perform operations that require superuser permissions, use thesudocommand. -
In the SSH key field, paste the contents of the public key file. You need to create a key pair for the SSH connection yourself.
-
If required, grant access to the serial console.
-
If you want to add several users with SSH keys to the VM at the same time, specify these users' data under Metadata.
In public Linux images provided by Yandex Cloud, the functionality of connecting over SSH using login and password is disabled by default.
-
-
(Optional) Under Placement, select a VM placement group.
-
Click Create VM.
The VM appears in the list. Once created, the VM is assigned an IP address and a host name (FQDN).
Connect to the VM
Note
SSH connections using a login and password are disabled by default on public Linux images that are provided by Yandex Cloud.
You can connect to a VM with the RUNNING status over SSH. Some time may be required to initialize all the services after the VM starts. If there is a connection error, retry after a few minutes.
To connect, you can use the ssh utility on Linux/macOS/Windows 10 and PuTTY on Windows 7/8.
VM security groups must allow incoming TCP traffic to port 22.
To connect, specify the VM's public IP address. You can find out the public IP address in the management console. On the VM's page, go to the Network section and find the Public IPv4 field. If you created a VM with an internal IP address only, bind it to a public IP address.
You can also use the internal IP addresses and FQDNs to establish an SSH connection between the VMs on a single cloud network in Yandex Cloud.
In the terminal, run this command:
ssh <username>@<VM_public_IP_address>
Where <username> is the VM account username.
If you have multiple private keys, specify the one you need:
ssh -i <key_path/key_file_name><username>@<VM_public_IP_address>
If this is the first time you connect to a VM, you will see a warning about an unknown host:
The authenticity of host '130.193.40.101 (130.193.40.101)' cannot be established.
ECDSA key fingerprint is SHA256:PoaSwqxRc8g6iOXtiH7ayGHpSN0MXwUfWHk********.
Are you sure you want to continue connecting (yes/no)?
Type yes in the terminal and press Enter.
Make sure that the Windows account has read privileges on the folder containing the keys.
To connect to the VM, execute the following command in the command line:
ssh <username>@<VM_public_IP_address>
Where <username> is the VM account username.
If you have multiple private keys, specify the one you need:
ssh -i <key_path\key_file_name> <username>@<VM_public_IP_address>
If this is the first time you connect to a VM, you will see a warning about an unknown host:
The authenticity of host '130.193.40.101 (130.193.40.101)' cannot be established.
ECDSA key fingerprint is SHA256:PoaSwqxRc8g6iOXtiH7ayGHpSN0MXwUfWHk********.
Are you sure you want to continue connecting (yes/no)?
Type yes in the command prompt and press Enter.
Establish a connection using the PuTTY app:
- Run the Pageant application.
- Right-click on the Pageant icon in the task bar.
- In the context menu, select Add key.
- Select a PuTTY-generated private key in the
.ppkformat. If a password is set for the key, enter it.
- Run PuTTY.
-
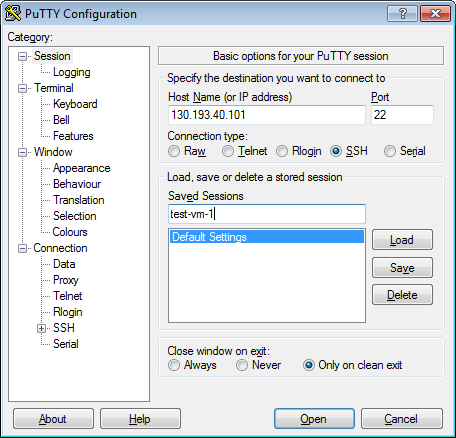
In the Host Name (or IP address) field, enter the public IP address of the VM you want to connect to. Specify port
22and SSH as the connection type.
-
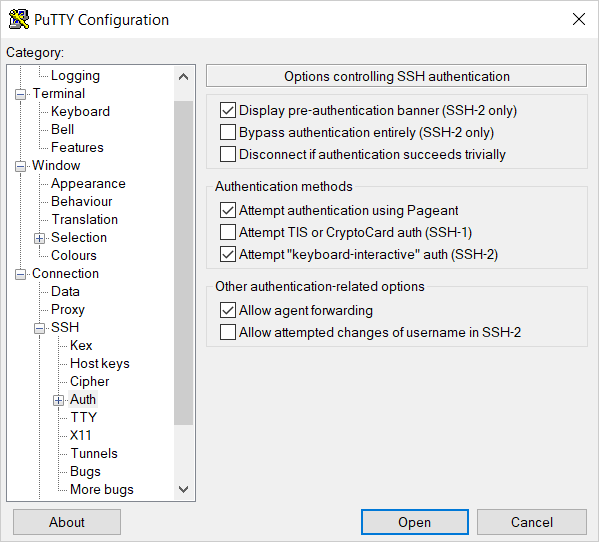
In the tree on the left, select Connection → SSH → Auth.
-
Set the Allow agent forwarding option.
-
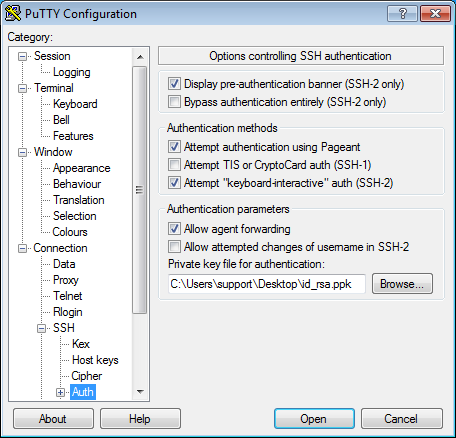
In the tree on the left, select Connection → SSH → Auth → Credentials.
-
In the Private key file for authentication field, select the file with the private key.
-
Go back to the Sessions menu. In the Saved sessions field, enter any session name and click Save. The session settings are saved under the specified name. You can use this session profile to connect using Pageant.
-
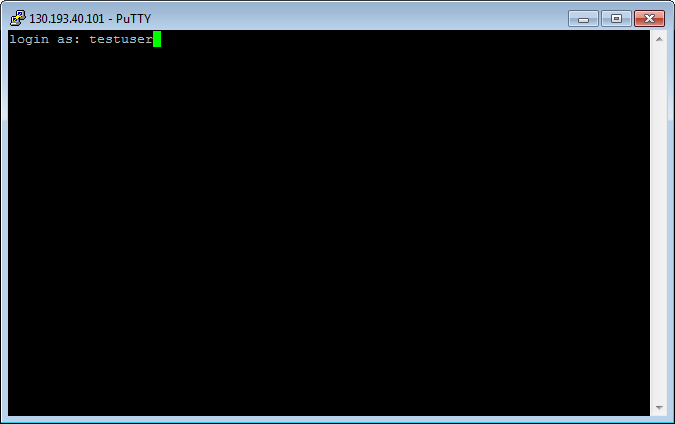
Click Open. If this is the first time you connect to a VM, you might see a warning about an unknown host:
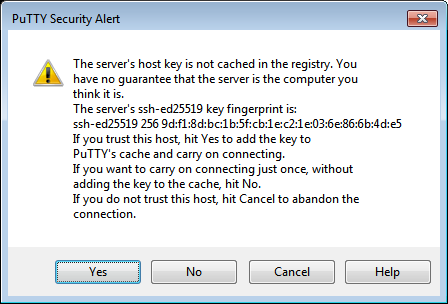
Click Accept. A terminal window opens suggesting that you enter the login of the user on whose behalf the connection is being established. Type the username that you specified when creating the VM and press Enter. If everything is configured correctly, the connection with the server will be established.
-
If you saved the session profile in PuTTY, you can use Pageant to establish a connection in the future:
- Right-click on the Pageant icon in the task bar.
- Select the Saved sessions menu item.
- In the saved sessions list, select the necessary session.
For more information on how to solve connection issues, see FAQ.
Configure the serial console
Using the serial console, you can connect to a VM regardless of the network or OS state (for example, if there are loading or SSH access issues).
Make sure you configure access to the VM via the serial console in advance.
Delete the VM
If you no longer plan to use a virtual machine, delete it.